
Be yourself; Everyone else is already taken.
— Oscar Wilde.
This is the first post on my new blog. I’m just getting this new blog going, so stay tuned for more. Subscribe below to get notified when I post new updates.
Be yourself; Everyone else is already taken.
— Oscar Wilde.
This is the first post on my new blog. I’m just getting this new blog going, so stay tuned for more. Subscribe below to get notified when I post new updates.
This is an example post, originally published as part of Blogging University. Enroll in one of our ten programs, and start your blog right.
You’re going to publish a post today. Don’t worry about how your blog looks. Don’t worry if you haven’t given it a name yet, or you’re feeling overwhelmed. Just click the “New Post” button, and tell us why you’re here.
Why do this?
The post can be short or long, a personal intro to your life or a bloggy mission statement, a manifesto for the future or a simple outline of your the types of things you hope to publish.
To help you get started, here are a few questions:
You’re not locked into any of this; one of the wonderful things about blogs is how they constantly evolve as we learn, grow, and interact with one another — but it’s good to know where and why you started, and articulating your goals may just give you a few other post ideas.
Can’t think how to get started? Just write the first thing that pops into your head. Anne Lamott, author of a book on writing we love, says that you need to give yourself permission to write a “crappy first draft”. Anne makes a great point — just start writing, and worry about editing it later.
When you’re ready to publish, give your post three to five tags that describe your blog’s focus — writing, photography, fiction, parenting, food, cars, movies, sports, whatever. These tags will help others who care about your topics find you in the Reader. Make sure one of the tags is “zerotohero,” so other new bloggers can find you, too.


What people want in life is to be accepted and appreciated and as a LEADER you bring it up. The more you have followers not on social media, it is who you are and what is your action making their life changed.


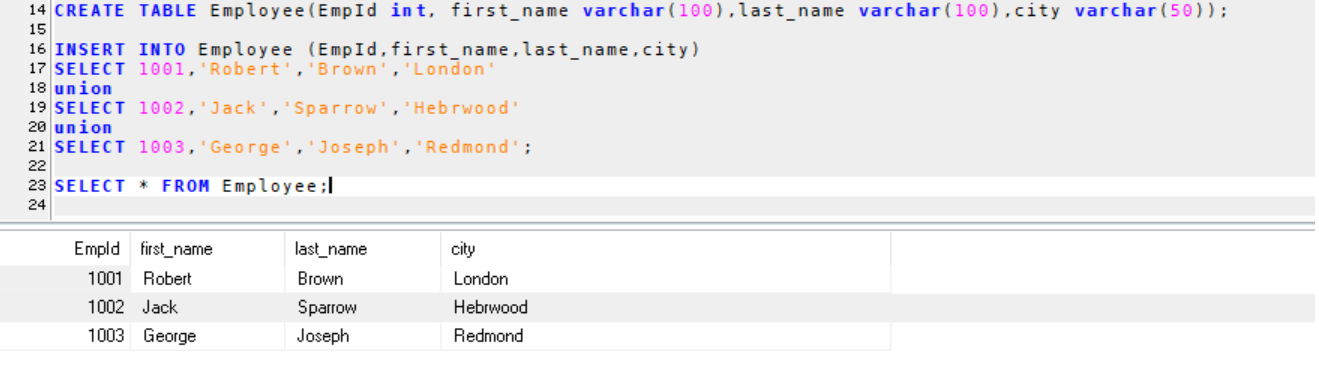
CREATE TABLE Employee
(
EmpId int,
first_name varchar(100),
last_name varchar(100),
city varchar(50)
);
INSERT INTO Employee (EmpId,first_name,last_name,city)
SELECT 1001,’Robert‘,’Brown‘,’London‘
UNION
SELECT 1002,’Jack‘,’Sparrow‘,’Hebrwood‘
UNION
SELECT 1003,’George‘,’Joseph‘,’Redmond‘;
Step 2:
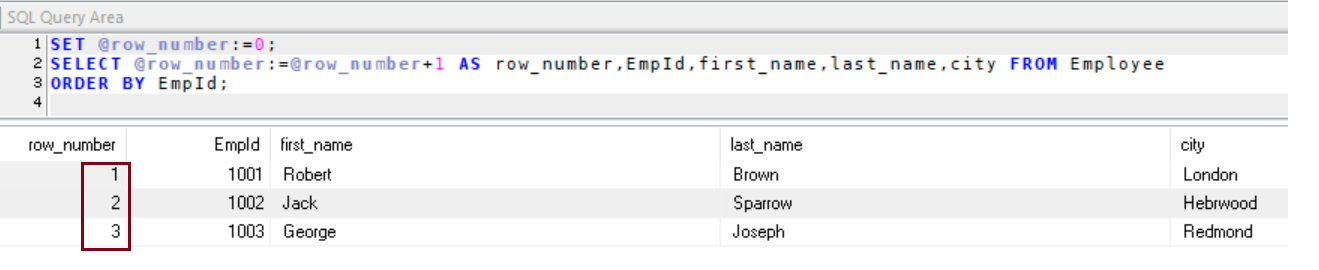
Method 1 : Set a variable and use it in a SELECT statement
Execute the SET command in the query window, this means your setting a variable @row_number to 0.
SET @row_number:=0;
Now, execute the below query you get the query results with row number 1,2,3 etc.
SELECT @row_number:=@row_number+1 AS row_number,
EmpId,
first_name,
last_name,
city
FROM Employee
ORDER BY EmpId;
At this point, you might have got a question why should we user variable and setting to 0, what happens if we do not set variable to 0 ? what will be output of @row_number? To answer your question @row_number gives the server sequence number which will be unique and every time you run the query @row_number value will keep increasing.
Let’s say, you are running the query first time and it has 3 rows, row_number will be 1,2,3. The second time you run the same query now row_number will be 4,5,6. The third time you run the same query now row_number will be 7,8,9 as it goes on becomes the unwanted results isn’t?
Step 3:
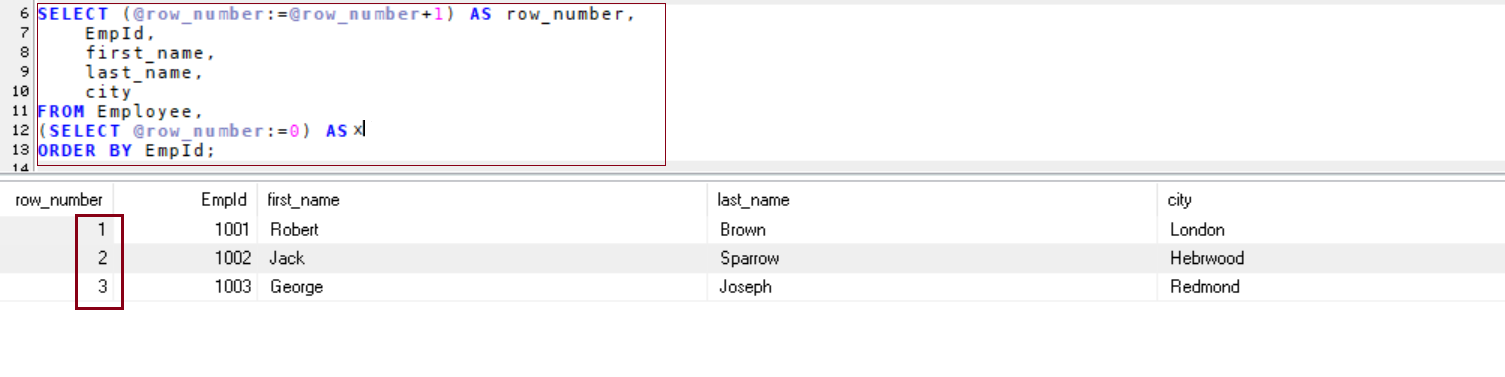
Method 2 : Use a variable as a table and cross join it with the source table
Isn’t possible to get it done with single query ? Yes, possible using cross join
SELECT (@row_number:=@row_number+1) AS row_number,
EmpId,
first_name,
last_name,
city
FROM Employee,
(SELECT @row_number:=0) AS x
ORDER BY EmpId;
Note that yellow , highlighted and then placed select statement as assigning @row_number to 0 value.
If you run your application without next step you will encounter an fatal error @row_number must be defined.
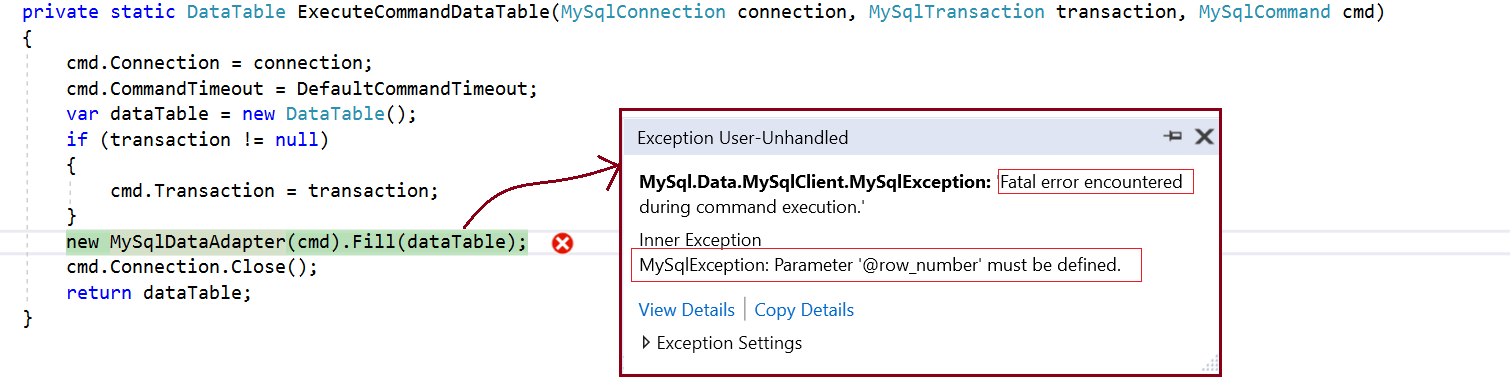
Database=testdb;Data Source=localhost;User Id=root;Password=****;Allow User Variables=True;
In this article we have seen, how Microsoft SQL Server and MySQL work on getting row_number in the select query. Please make sure you can follow step by steps example and include Allow user variables=true in your connection string to complete the results
Reference:
MySQL How to find Command Line Client?

routes.MapRoute(name: “Default”, template: “{controller=Home}/{action=Index}/{id?}”);
[Route(“api/[controller]”)]
public class ProductsController : Controller
{
[HttpGet(“{id}”)]
public IActionResult GetProduct(int id)
{
…
}
}
public async Task Login(LoginViewModel model,
string returnUrl = null) { … }
using System.ComponentModel.DataAnnotations;
public class LoginViewModel
{
[Required]
[EmailAddress]
public string Email { get; set; }
[Required]
[DataType(DataType.Password)]
public string Password { get; set; }
[Display(Name = “Remember me?”)]
public bool RememberMe { get; set; }
}
public async Task Login(LoginViewModel model,
string returnUrl = null)
{
if (ModelState.IsValid)
{
// work with the model
}
// At this point, something failed, redisplay form
return View(model);
}
@ServiceName.GetTitle
Web APIs
@model IEnumerable
Thank you for confirming your email.
Please <a asp-controller="Account"
asp-action=”Login”>Click here to Log in.
<script src="https://ajax.aspnetcdn.com/ajax/jquery/jquery-2.1.4.min.js"
asp-fallback-src=”~/lib/jquery/dist/jquery.min.js”
asp-fallback-test=”window.jQuery”>
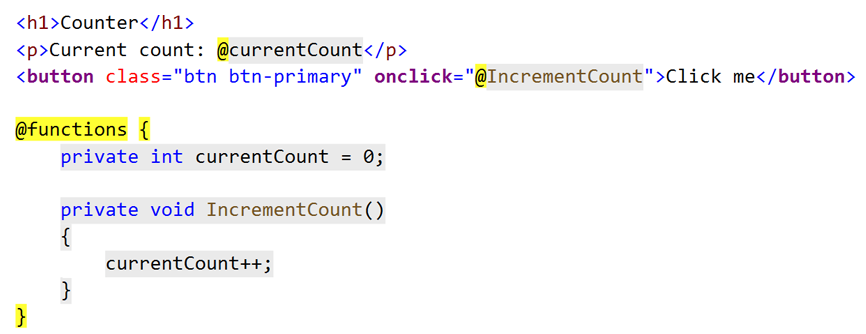
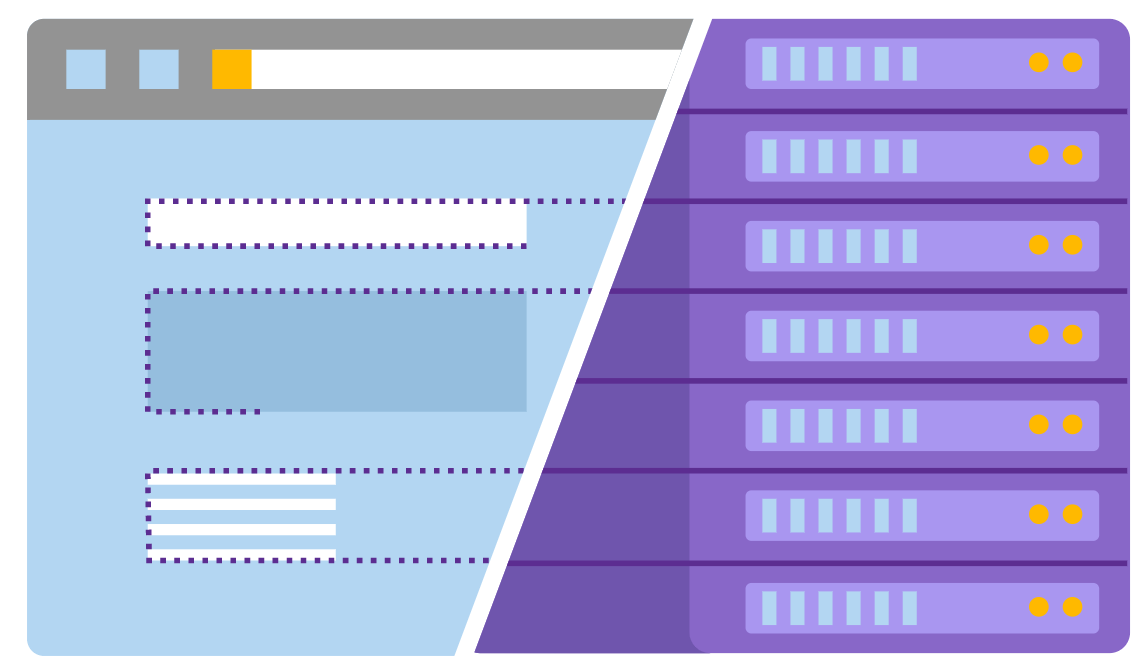


Find more information on what new features available in Blazor Asp.Net Core features with Blazor
Downloads available at https://aka.ms/blazor-ebook

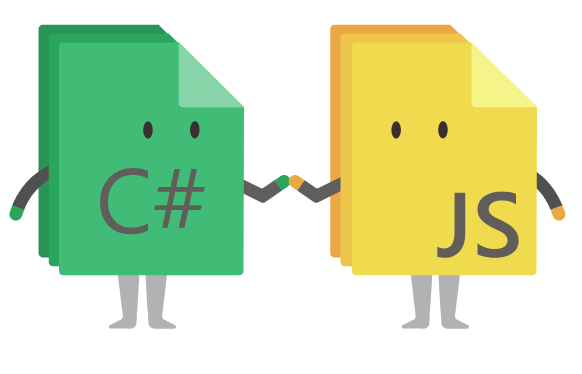
As to summarize, the core features and basic concepts are available here Building Web app client UI using Blazor with C#
