Capturing Traffic from .NET Services with Fiddler

Capturing Traffic from .NET Services with Fiddler

Have you ever wondered how to trace incoming request or response to server when working on emails via C#.NET program.

In General Fiddler is the free version tool available online, and one of the tools is 
Fiddler – Free Web Debugging Proxy – Telerik

1. Download Fiddler https://www.telerik.com/download/fiddler
2. To trace incoming from .Net project required to add .net settings in machine config file
3. Now the question is how to do ?
4. Open notepad as Run as Administrator 
5. Notepad File menu click on open and paste this code %WinDir%\Microsoft.NET\Framework\v2.0.50727\CONFIG
6.  Choose the file type as all files 
7. Look for machine.config file
8. Open it
9. Add the following lines after  tag and save 

Add the following XML block as a peer to the existing system.net element, replacing any existing default Proxy

element if present:
 

<defaultProxy
                enabled = “true”
                useDefaultCredentials = “true”>
<proxy autoDetect="false" bypassonlocal="false" proxyaddress="http://127.0.0.1:8888” usesystemdefault=”false” />

10. Now Start the Fiddler
11. Fiddler will capture all the requests from .Net 


C# Evolution History

Version Year .NET Framework Visual Studio Features
C# 1.0 2002 1.0 / 1.1 Visual Studio 2002 Basic Features
C# 2.0 2005 2.0 Visual Studio 2005
  • Generics
  • Partial types
  • Anonymous methods
  • Nullable types
  • Iterators
  • Covariance and contravariance
C# 3.0 2007 3.0 / 3.5 Visual Studio 2008
  • Auto implemented properties
  • Anonymous types
  • Query expressions
  • Lambda expression
  • Expression trees
  • Extension methods
C# 4.0 2010 4.0 Visual Studio 2010
  • Dynamic binding
  • Named/optional arguments
  • Generic covariant and contravariant
  • Embedded interop types
C# 5.0 2012 4.5 Visual Studio 2012 / 13
  • Asynchronous members
  • Caller info attributes
C# 6.0 2015 4.6 Visual Studio 2015
  • Static imports
  • Exception filters
  • Property initializers
  • Expression bodied members
  • Null propagator
  • String interpolation
  • nameof operator
  • Dictionary initializer
C# 7.0 2017 .NET Core Visual Studio 2017
  • Out variables
  • Tuples and deconstruction
  • Pattern matching
  • Local functions
  • Expanded expression bodied members
  • Ref locals and returns

What’s new in SQL Server 2017 ?

What’s new in SQL Server 2017

SQL Server 2017 represents a major step towards making SQL Server a platform that gives you choices of development languages, data types, on-premises or cloud, and operating systems by bringing the power of SQL Server to Linux, Linux-based Docker containers, and Windows. This topic summarizes what is new for specific feature areas and includes links to additional details. 

SQL Server 2017 Database Engine
SQL Server 2017 includes many new Database Engine features, enhancements, and performance improvements.
  • CLR Assemblies
  • Resumable online index rebuild
  • IDENTITY_CACHE
  • Adaptive query processing
  • Automatic database tuning
  • New graph database capabilities
  • modified_extent_page_count
  • Always On Availability Group
  • New Availability Groups
  • Database Tuning Advisor (DTA)
  • In-memory enhancements
  • New String Functions are CONCAT_WS, TRANSLATE, TRIM and  WITHIN GROUP  is now supported for the  STRING_AGG function.  
  • bulk access options
  • Memory-optimized object enhancements
  • DATABASE SCOPED CREDENTIAL
  • Database COMPATIBILITY_LEVEL 140 is added.

How to download Adventure Works 2014 Sample Database ?

AdventureWorks 2014 for SQL Server 2014 has been released and is ready for download, [link].
The sample includes various flavors of samples that you can use with SQL Server 2014, and are:
1. OLTP Database
2. DW Database
3. Tabular Model Database
4. Multi Dimensional Model Database
SQLServer2014_AdventureWorks2014_Sample_DBs

How to read news from google?

News API is a simple and easy-to-use API that returns JSON metadata for headlines and articles live all over the web right now.

News API is a simple HTTP REST API for searching and retrieving live articles from all over the web. It can help you answer questions like:

  • What top stories is the NY Times running right now?
  • What new articles were published about the next iPhone today?
  • Has my company or product been mentioned or reviewed by any blogs recently?
  • How many social shares has an article received? Coming soon!
You can search for articles with any combination of the following criteria:
  • Keyword or phrase. Eg: find all articles containing the word ‘Microsoft’.
  • Date published. Eg: find all articles published yesterday.
  • Source name. Eg: find all articles by ‘TechCrunch’.
  • Source domain name. Eg: find all articles published on nytimes.com.
  • Language. Eg: find all articles written in English.
You can sort the results in the following orders:
  • Date published
  • Relevancy to search keyword
  • Popularity of source
  • Social shares Coming soon!
You need an API key to use the API – this is a unique key that identifies your requests. They’re free for development, open-source, and non-commercial use. You can get one here: get API key.

https://newsapi.org/s/google-news-api

Bing News Search API with C#

This article shows you how use the Bing Search API, part of Microsoft Cognitive Services on Azure. While this article employs C#, the API is a RESTful Web service compatible with any programming language that can make HTTP requests and parse JSON.
The example code was written in C# as a .NET Core application, with minimal external dependencies, so you can also run it on Linux or Mac OS X using Mono.
Refer to the API reference for technical details about the APIs.

Reference : https://docs.microsoft.com/en-us/azure/cognitive-services/

Prerequisites

You must have a Cognitive Services API account with Bing Search APIs. The free trial is sufficient for this quickstart. You will need the access key provided when you activate your free trial, or you may use a paid subscription key from your Azure dashboard.

What is Bing News search?

The Bing News Search API is a RESTful web service, making it easy to call from any programming language that can make HTTP requests and parse JSON. You can use the service using either the REST API, or the SDK.
  1. Create a Cognitive Services API account with access to the Bing Search APIs. If you don’t have an Azure subscription, you can create an account for free.
  2. Send a request to the API, with a valid search query.
  3. Process the API response by parsing the returned JSON message.

The Bing News Search API returns News search results from the Bing search engine.
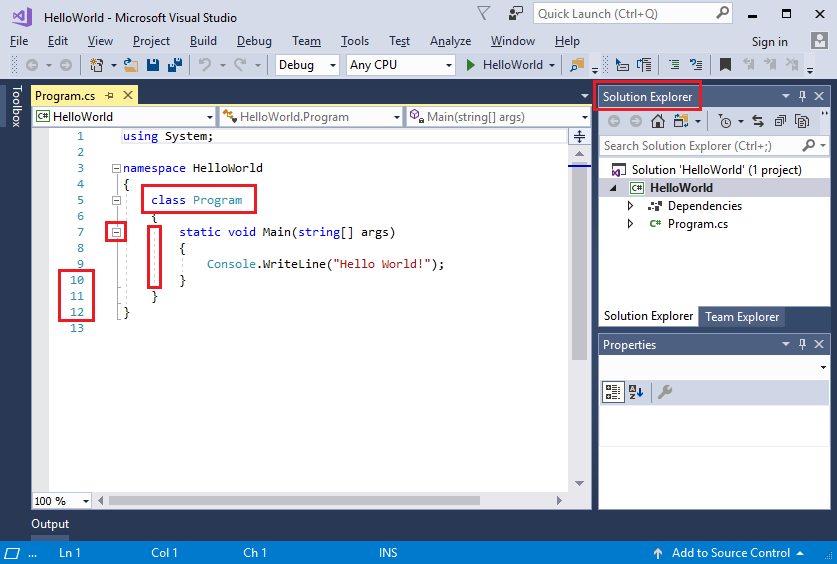
  1. Create a new Console solution in Visual Studio (the Community Edition is fine).
  2. Replace Program.cs with the code provided below.
  3. Replace the accessKey value with an access key valid for your subscription.
  4. Run the program.
C#Copy
using System;
using System.Text;
using System.Net;
using System.IO;
using System.Collections.Generic;

namespace BingNewsSearchCSharpCore
{

class Program
{
// **********************************************
// *** Update or verify the following values. ***
// **********************************************

// Replace the access Key string value with your valid access key.
const string accessKey = "enter key here";

// Verify the endpoint URI. At this writing, only one endpoint is used for Bing
// search APIs. In the future, regional endpoints may be available. If you
// encounter unexpected authorization errors, double-check this value against
// the endpoint for your Bing News search instance in your Azure dashboard.
const string uriBase = "https://api.cognitive.microsoft.com/bing/v7.0/news/search";

const string searchTerm = "Microsoft";

// Used to return news search results including relevant headers
struct SearchResult
{
public String jsonResult;
public Dictionary relevantHeaders;
}

static void Main()
{
Console.OutputEncoding = System.Text.Encoding.UTF8;
Console.WriteLine("Searching news for: " + searchTerm);

SearchResult result = BingNewsSearch(searchTerm);

Console.WriteLine("\nRelevant HTTP Headers:\n");
foreach (var header in result.relevantHeaders)
Console.WriteLine(header.Key + ": " + header.Value);

Console.WriteLine("\nJSON Response:\n");
Console.WriteLine(JsonPrettyPrint(result.jsonResult));

Console.Write("\nPress Enter to exit ");
Console.ReadLine();
}

///
/// Performs a Bing News search and return the results as a SearchResult.
///

static SearchResult BingNewsSearch(string searchQuery)
{
// Construct the URI of the search request
var uriQuery = uriBase + "?q=" + Uri.EscapeDataString(searchQuery);

// Perform the Web request and get the response
WebRequest request = HttpWebRequest.Create(uriQuery);
request.Headers["Ocp-Apim-Subscription-Key"] = accessKey;
HttpWebResponse response = (HttpWebResponse)request.GetResponseAsync().Result;
string json = new StreamReader(response.GetResponseStream()).ReadToEnd();

// Create result object for return
var searchResult = new SearchResult();
searchResult.jsonResult = json;
searchResult.relevantHeaders = new Dictionary();

// Extract Bing HTTP headers
foreach (String header in response.Headers)
{
if (header.StartsWith("BingAPIs-") || header.StartsWith("X-MSEdge-"))
searchResult.relevantHeaders[header] = response.Headers[header];
}

return searchResult;
}

///
/// Formats the given JSON string by adding line breaks and indents.
///

/// The raw JSON string to format.
/// The formatted JSON string.
static string JsonPrettyPrint(string json)
{
if (string.IsNullOrEmpty(json))
return string.Empty;

json = json.Replace(Environment.NewLine, "").Replace("\t", "");

StringBuilder sb = new StringBuilder();
bool quote = false;
bool ignore = false;
int offset = 0;
int indentLength = 3;

foreach (char ch in json)
{
switch (ch)
{
case '"':
if (!ignore) quote = !quote;
break;
case '\'':
if (quote) ignore = !ignore;
break;
}

if (quote)
sb.Append(ch);
else
{
switch (ch)
{
case '{':
case '[':
sb.Append(ch);
sb.Append(Environment.NewLine);
sb.Append(new string(' ', ++offset * indentLength));
break;
case '}':
case ']':
sb.Append(Environment.NewLine);
sb.Append(new string(' ', --offset * indentLength));
sb.Append(ch);
break;
case ',':
sb.Append(ch);
sb.Append(Environment.NewLine);
sb.Append(new string(' ', offset * indentLength));
break;
case ':':
sb.Append(ch);
sb.Append(' ');
break;
default:
if (ch != ' ') sb.Append(ch);
break;
}
}
}

return sb.ToString().Trim();
}
}
}
Response
A successful response is returned in JSON, as shown in the following example:
JSONCopy
{
"_type": "News",
"readLink": "https:\/\/api.cognitive.microsoft.com\/api\/v7\/news\/search?q=Microsoft",
"totalEstimatedMatches": 36,
"sort": [
{
"name": "Best match",
"id": "relevance",
"isSelected": true,
"url": "https:\/\/api.cognitive.microsoft.com\/api\/v7\/news\/search?q=Microsoft"
},
{
"name": "Most recent",
"id": "date",
"isSelected": false,
"url": "https:\/\/api.cognitive.microsoft.com\/api\/v7\/news\/search?q=Microsoft&sortby=date"
}
],
"value": [
{
"name": "Microsoft to open flagship London brick-and-mortar retail store",
"url": "http:\/\/www.contoso.com\/article\/microsoft-to-open-flagshi...",
"image": {
"thumbnail": {
"contentUrl": "https:\/\/www.bing.com\/th?id=ON.F9E4A49EC010417...",
"width": 220,
"height": 146
}
},
"description": "After years of rumors about Microsoft opening a brick-and-mortar...",
"about": [
{
"readLink": "https:\/\/api.cognitive.microsoft.com\/api\/v7\/entiti...",
"name": "Microsoft"
},
{
"readLink": "https:\/\/api.cognitive.microsoft.com\/api\/v7\/entit...",
"name": "London"
}
],
"provider": [
{
"_type": "Organization",
"name": "Contoso"
}
],
"datePublished": "2017-09-21T21:16:00.0000000Z",
"category": "ScienceAndTechnology"
},

. . .

{
"name": "Microsoft adds Availability Zones to its Azure cloud platform",
"url": "https:\/\/contoso.com\/2017\/09\/21\/microsoft-adds-availability...",
"image": {
"thumbnail": {
"contentUrl": "https:\/\/www.bing.com\/th?id=ON.0AE7595B9720...",
"width": 700,
"height": 466
}
},
"description": "Microsoft has begun adding Availability Zones to its...",
"about": [
{
"readLink": "https:\/\/api.cognitive.microsoft.com\/api\/v7\/entities\/a093e9b...",
"name": "Microsoft"
},
{
"readLink": "https:\/\/api.cognitive.microsoft.com\/api\/v7\/entities\/cf3abf7d-e379-...",
"name": "Windows Azure"
},
{
"readLink": "https:\/\/api.cognitive.microsoft.com\/api\/v7\/entities\/9cdd061c-1fae-d0...",
"name": "Cloud"
}
],
"provider": [
{
"_type": "Organization",
"name": "Contoso"
}
],
"datePublished": "2017-09-21T09:01:00.0000000Z",
"category": "ScienceAndTechnology"
}
]
}

Get started with SharePoint

When you sign in to Office 365, or your organization’s corporate SharePoint Server site, click SharePoint or Sites in the app launcher navigation or top bar. These are your entry points into SharePoint.
SharePoint Online

The app launcher with SharePoint highlighted.

You can also click SharePoint on the header bar

Headerbar with SharePoint highlighted

SharePoint Server 2016

SharePoint app launcher with sites highlighted

SharePoint Server 2013

SharePoint 2013 top menu bar

What’s in a SharePoint site

Organizations use SharePoint to create websites. In Office 365, you can create a site from the SharePoint home page. You also get a SharePoint team site whenever you create an Office 365 group in Outlook Online or Office 365. If you’re in SharePoint Server, you can create a team or a number of other types of sites. You can use the sites as a secure place to store, organize, share, and access information from any device. All you need is a web browser, such as Microsoft Edge, Internet Explorer, Google Chrome, or Mozilla Firefox. Get the SharePoint mobile app to stay connected from your mobile devices.

10 things you can do with SharePoint, right now

To do this…
Try this…
Upload files to your SharePoint document library, so you can access them from anywhere
You can drag files from your computer into your document library,.
In SharePoint Online, click Upload on the command bar. If you use Microsoft Edge, you can upload either files or folders.
SharePoint Online

Screenshot of the open Upload menu in a document library.

SharePoint Server 2016

Document library with Upload button highlighted

In SharePoint Server 2013, click New document and browse for a file. Depending on how SharePoint is configured, you may have to click Upload existing file first.
For more info, see Upload files to a library.
Open a document in a document library
Click to open the document you want to work on and it will open in Office Online. If you have the application installed on your computer and want to use it, click Edit Document > Edit in . For info on document libraries, see What is a document library?
Word document opened from SharePoint library with Edit in Word highlighted
Work with others on the same document, at the same time
In a document library, click to open the document you want to work on. It will open in Office Online. The number of people currently editing the document appears at the top right of the document.
Drop down dialog that shows who's editing a document
Share documents
Select the document you want to share, click the ellipses () to open the menu, and then click Share.
SharePoint Online

SPO Document right click menu with Share highlighted

SharePoint Server 2016/2013

Clicking Share on a file

Share sites
If you have site owner permissions, click SharePoint or Sites, choose the site you want to share, and then click Share  Share button .
Create a team site
If you’re using Office 365, you can create a site from the SharePoint home page, and it automatically creates an Office 365 group. If you create an Office 365 group in Outlook or People, and you automatically get a team site in SharePoint Online. For more on creating team sites, see Create a team site in SharePoint Online.
If you have site owner permissions with SharePoint Server 2016 or SharePoint Server 2013 click Sites, and then click + new site or + new.
Screenshot of new site button on Sites page New Site button
Add a list or library to your team site
To add a list or library to SharePoint Online, click + New from within a site, and then pick List or Library from the list.

New link clicked with List highlighted

To add a list or library for SharePoint Server versions of SharePoint click SettingsSharePoint 2016 Settings button on title bar. and then click Add an app.
Add an application (list, library)
Keep previous versions of a document while you make changes to it
In SharePoint Online, right-click a document in a library, and then click Version History (you might have to scroll the menu),

Document library right click menu with version history highlighted

For SharePoint Server versions, click the ellipses () next to the file, and then click the ellipses () again in the dialog to get to the menu, or select the document and click Version History on the Files tab.

The file tab with Version History highlighted

SharePoint Server ribbon and Files tab
Search for something
Type a search keyword into the Search box, and then click the Search icon Search box magnifying glass icon .
SharePoint Online

Site search field

SharePoint Server 2016 and 2013

Screenshot of search box

Share information with your entire organization
In Office 365, SharePoint Online, or SharePoint Server 2016, click the app launcher  , then click the Yammer or Newsfeed tile, type your message, and then click Post.
For SharePoint Server 2013, click Yammer or Newsfeed in the header bar.

SharePoint 2013 top menu bar

Copy and move files and folders between libraries

There are several ways to copy or move files, depending on the version of SharePoint you’re using. In SharePoint Online, you can use the Copy to or Move to command to copy or move files between libraries. For more info, see Move or copy a folder, file, or link in a document library.

Copy to button on main menu

Move to and Copy to buttons in SharePoint Online
Getting your SharePoint library into an Explorer view can provide a fast way to do all file operations. You can do it essentially two ways, syncing the folders, or opening in Explorer. The difference is that synced folders persist and can be used anytime from any app, while Open in Explorer is a one-time operation.
When you sync a library, you’re making a local copy on your desktop machine. If you sync two libraries, you can copy or move files and folders, create folders, and delete one or more file or folder. Your synced library is automatically synced with the SharePoint library. To sync libraries with SharePoint Online, see Sync files to your computer from a document library. For SharePoint Server 2016 or SharePoint Server 2013, see Set up your computer to sync SharePoint Server on-premises files.
Another way to use Windows Explorer to manipulate files is to open a library in Explorer. Like synced folders, ths allows you to copy, move, and edit files and folders the way do on your desktop. Files are automatically updated in your SharePoint library. For more info, see Ways to work with site library files in File Explorer.

Want to control access to your stuff?

SharePoint is all about permissions. Get a better understanding of how permissions work, and you’ll understand how to control access to stuff on sites. Watch Video: Understanding permissions in SharePoint.
Once you understand how permissions work, see how to do it in Edit and manage permissions for a SharePoint list or library.

What is Office 365 ?

Office 365 is an integrated experience of apps and services, designed to help you pursue your passion and grow your business. Get apps like Word, Excel, PowerPoint, and more, updated monthly with the latest features and security updates.

Use cloud-powered email to reach customers and coworkers wherever work takes you.

Collaborate in Microsoft Teams, the new hub for teamwork where you can chat, organize meetings, and share files.

Save files to One Drive with one terabyte of online storage, allowing access across devices and on the go.

Run your business with the Business Apps, empowering you to manage customer scheduling, invoicing, referrals, and more, all from one place.

Visit our website to learn more about how Office 365 can help you securely run and grow your business.

With Office 365 subscription plans you can create your best work with the premium versions of the Office applications across all your devices: Word, Excel, PowerPoint, One Note, Outlook, Publisher, and Access (Publisher and Access are available on PC only). You can install Office 365 across multiple devices, including PCs, Macs, Android™ tablets, Android phones, iPad®, and iPhone®. In addition, with Office 365 you get services like online storage with One Drive, Skype minutes for home use, and advanced Outlook.com security. When you have an active Office 365 subscription, you always have the most up-to-date version of the Office applications. 

Office 2019

Office 2019 is a one-time purchase with the classic versions of the Office applications such as Word, Excel, and PowerPoint for use on a single PC or Mac. The applications are not automatically updated; to get the latest version, you must purchase Office again when the new version becomes available. Current Office application versions available for one-time purchase are Office 2019 for Windows and Office 2019 for Mac. Previous versions include Office 2016, Office 2013, Office 2011 for Mac, Office 2010, Office 2007, Office 2008 for Mac, and Office 2004 for Mac. Office as a one-time purchase does not include any of the services included in Office 365. Learn more about the difference between Office 365 and Office 2019.

What is the meaning of non ECR category in passport?

If Passport applicant  has qualification  below 10th standard school belongs  ENR Category

ECR (Emigration Check Required) 


If Passport applicant  has qualification above 10th standard school belongs  ECNR Category

ECNR (Emigration Check Not Required).

The category for an ECNR (or NonECR) that appears to apply for you is “holder of a matriculation certificate.” so if you completed your 10th class you belong to the nonECR category.

Visual Studio 2017 Features

The Visual Studio integrated development environment is a creative launching pad that you can use to edit, debug, and build code, and then publish an app. An integrated development environment (IDE) is a feature-rich program that can be used for many aspects of software development. Over and above the standard editor and debugger that most IDEs provide, Visual Studio includes compilers, code completion tools, graphical designers, and many more features to ease the software development process.
Visual Studio is available for Windows and Mac. Visual Studio for Mac has many of the same features as Visual Studio 2017, and is optimized for developing cross-platform and mobile apps. This article focuses on the Windows version of Visual Studio 2017.
There are three editions of Visual Studio 2017: Community, Professional, and Enterprise. See Compare Visual Studio 2017 IDEs to learn about which features are supported in each edition.
This overview article introduces you to the basic features of the IDE. We’ll walk through some things you can do with Visual Studio, including creating a simple project, using IntelliSense as a coding aid, and debugging an app to see the value of a variable during the program’s execution. We’ll also take a tour of the various tool windows.

Install the Visual Studio IDE

To get started, download Visual Studio 2017 and install it on your system.
The modular installer enables you to choose and install workloads, which are groups of features needed for the programming language or platform you prefer. To follow the steps for creating a program, be sure to select the .NET Core cross-platform developmentworkload during installation.
.NET Core cross-platform development workload in Visual Studio Installer
When you start Visual Studio for the first time, you can optionally sign in using your Microsoft account, or your work or school account.

Tour of the IDE

To give you a high-level visual overview of Visual Studio, the following image shows Visual Studio with an open project and several key tool windows you’ll likely use:
The Visual Studio IDE
  • Solution Explorer (top right) lets you view, navigate, and manage your code files. Solution Explorer can help organize your code by grouping the files into solutions and projects.
  • The editor window (center), where you’ll likely spend a majority of your time, displays file contents. This is where you can edit code or design a user interface such as a window with buttons and text boxes.
  • The Output window (bottom center) is where Visual Studio sends notifications such as debugging and error messages, compiler warnings, publishing status messages, and more. Each message source has its own tab.
  • Team Explorer (bottom right) lets you track work items and share code with others using version control technologies such as Git and Team Foundation Version Control (TFVC).
Some of the popular features in Visual Studio that help you to be more productive as you develop software include:
  • Refactoring includes operations such as intelligent renaming of variables, extracting one or more lines of code into a new method, changing the order of method parameters, and more.
    Refactoring in Visual Studio
  • IntelliSense is a term for a set of features that displays information about your code directly in the editor and, in some cases, write small bits of code for you. It’s like having basic documentation inline in the editor, which saves you from having to look up type information elsewhere. IntelliSense features vary by language. For more information, see C# IntelliSenseVisual C++ IntelliSenseJavaScript IntelliSense, and Visual Basic IntelliSense. The following illustration shows how IntelliSense displays a member list for a type:
    Visual Studio Member List
  • Visual Studio can seem overwhelming at times with so many menus, options, and properties. The Quick Launch search box is a great way to rapidly find what you need in Visual Studio. When you start typing the name of something you’re looking for, Visual Studio lists results that take you exactly where you need to go. If you need to add functionality to Visual Studio, for example to add support for an additional programming language, Quick Launch provides results that open Visual Studio Installer to install a workload or individual component.
    Quick Launch search box in Visual Studio
  • Squiggles and Quick Actions
    Squiggles are wavy underlines that alert you to errors or potential problems in your code as you type. These visual clues enable you to fix problems immediately without waiting for the error to be discovered during build or when you run the program. If you hover over a squiggle, you see additional information about the error. A light bulb may also appear in the left margin with actions, known as Quick Actions, to fix the error.
    Squiggles in Visual Studio
  • The Call Hierarchy window shows the methods that call a selected method. This can be useful information when you’re thinking about changing or removing the method, or when you’re trying to track down a bug.
    Call Hierarchy window
  • CodeLens helps you find references to your code, changes to your code, linked bugs, work items, code reviews, and unit tests, all without leaving the editor.
    CodeLens
  • The Go To Definition feature takes you directly to the location where a function or type is defined.
    Go to Definition
  • The Peek Definition window shows the definition of a method or type without actually opening a separate file.
    Peek to Definition

Create a program

Let’s dive in and create a new, simple program.
  1. Open Visual Studio. On the menu, choose File > New > Project.
    New Project on menu bar” data-linktype=”relative-path” src=”https://docs.microsoft.com/en-us/visualstudio/ide/media/file-new-project-menu.png?view=vs-2017&#8243; style=”border: 0px; box-sizing: inherit; display: inline-block; height: auto; max-width: 100%;” />
  2. The New Project dialog box shows several project templates. A template contains the basic files and settings needed for a given project type. Choose the .NET Core category under Visual C#, and then choose the Console App (.NET Core) template. In the Nametext box, type HelloWorld, and then select the OK button.
    .NET Core app template
    Visual Studio creates the project. It’s a simple “Hello World” application that calls the Console.WriteLine() method to display the literal string “Hello World!” in the console (program output) window.
     Note
    If you don’t see the .NET Core category, you need to install the .NET Core cross-platform development workload. To do this, choose the Open Visual Studio Installer link on the bottom left of the New Project dialog. After Visual Studio Installer opens, scroll down and select the .NET Core cross-platform developmentworkload, and then select Modify.
    Shortly, you should see something like the following:
    Visual Studio IDE
    The C# code for your application shows in the editor window, which takes up most of the space. Notice that the text is automatically colorized to indicate different parts of the code, such as keywords and types. In addition, small, vertical dashed lines in the code indicate which braces match one another, and line numbers help you locate code later. You can choose the small, boxed minus signs to collapse or expand blocks of code. This code outlining feature lets you hide code you don’t need, helping to minimize onscreen clutter. The project files are listed on the right side in a window called Solution Explorer.
    Visual Studio IDE with red boxes
    There are other menus and tool windows available, but let’s move on for now.
  3. Now, start the app. You can do this by choosing Start Without Debugging from the Debug menu on the menu bar. You can also press Ctrl+F5.
    Start without debugging menu” data-linktype=”relative-path” src=”https://docs.microsoft.com/en-us/visualstudio/ide/media/overview-start-without-debugging.png?view=vs-2017&#8243; style=”border: 0px; box-sizing: inherit; display: inline-block; height: auto; max-width: 100%;” />
    Visual Studio builds the app, and a console window opens with the message Hello World!. You now have a running app!
    Console window
  4. To close the console window, press any key on your keyboard.
  5. Let’s add some additional code to the app. Add the following C# code before the line that says Console.WriteLine("Hello World!");:
    C#Copy
    Console.WriteLine("\nWhat is your name?");
    var name = Console.ReadLine();
    This code displays What is your name? in the console window, and then waits until the user enters some text followed by the Enter key.
  6. Change the line that says Console.WriteLine("Hello World!"); to the following code:
    C#Copy
    Console.WriteLine($"\nHello {name}!");
  7. Run the app again by selecting Debug > Start Without Debugging or by pressing Ctrl+F5.
    Visual Studio rebuilds the app, and a console window opens and prompts you for your name.
  8. Enter your name in the console window and press Enter.
    Console window input
  9. Press any key to close the console window and stop the running program.

Use refactoring and IntelliSense

Let’s look at a couple of the ways that refactoring and IntelliSense can help you code more efficiently.
First, let’s rename the name variable:
  1. Double-click the name variable to select it.
  2. Type in the new name for the variable, username.
    Notice that a gray box appears around the variable, and a light bulb appears in the margin.
  3. Select the light bulb icon to show the available Quick Actions. Select Rename ‘name’ to ‘username’.
    Rename action in Visual Studio
    The variable is renamed across the project, which in our case is only two places.
    Animated gif showing rename refactoring in Visual Studio
  4. Now let’s take a look at IntelliSense. Below the line that says Console.WriteLine($"\nHello {username}!");, type DateTime now = DateTime..
    A box displays the members of the DateTime class. In addition, the description of the currently selected member displays in a separate box.
    IntelliSense list members in Visual Studio
  5. Select the member named Now, which is a property of the class, by double-clicking on it or pressing Tab. Complete the line of code by adding a semi-colon ;.
  6. Below that, type in or copy the following lines of code:
    C#Copy
    int dayOfYear = now.DayOfYear;

    Console.Write("Day of year: ");
    Console.WriteLine(dayOfYear);
     Tip
    Console.Write is a little different to Console.WriteLine in that it doesn’t add a line terminator after it prints. That means that the next piece of text that’s sent to the output will print on the same line. You can hover over each of these methods in your code to see their description.
  7. Next, we’ll use refactoring again to make the code a little more concise. Click on the variable now in the line DateTime now = DateTime.Now;.
    Notice that a little screwdriver icon appears in the margin on that line.
  8. Click the screwdriver icon to see what suggestions Visual Studio has available. In this case, it’s showing the Inline temporary variable refactoring to remove a line of code without changing the overall behavior:
    Inline temporary variable refactoring in Visual Studio
  9. Click Inline temporary variable to refactor the code.
  10. Run the program again by pressing Ctrl+F5. The output looks something like this:
Console window with program output

Debug code

When you write code, you need to run it and test it for bugs. Visual Studio’s debugging system lets you step through code one statement at a time and inspect variables as you go. You can set breakpoints that stop execution of the code at a particular line. You can observe how the value of a variable changes as the code runs, and more.
Let’s set a breakpoint to see the value of the username variable while the program is “in flight”.
  1. Find the line of code that says Console.WriteLine($"\nHello {username}!");. To set a breakpoint on this line of code, that is, to make the program pause execution at this line, click in the far left margin of the editor. You can also click anywhere on the line of code and then press F9.
    A red circle appears in the far left margin, and the code is highlighted in red.
    Breakpoint on line of code in Visual Studio
  2. Start debugging by selecting Debug > Start Debugging or by pressing F5.
  3. When the console window appears and asks for your name, type it in and press Enter.
    Notice that the focus returns to the Visual Studio code editor and the line of code with the breakpoint is highlighted in yellow. This signifies that it’s the next line of code that the program will execute.
  4. Hover your mouse over the username variable to see its value. Alternatively, you can right-click on username and select Add Watch to add the variable to the Watchwindow, where you can also see its value.
    Variable value during debugging in Visual Studio
  5. To let the program run to completion, press F5 again.
To get more details about debugging in Visual Studio, see Debugger feature tour.
Design a site like this with WordPress.com
Get started