Essential Training To Get Your Cloud Ambitions Off the Ground
AWSome Day Online Conference is a free, online training event that will provide a step-by-step introduction to the core AWS services for compute, storage, database and networking. AWS technical experts will explain key features and use cases, share best practices, walk through technical demos, and be available to answer your questions one-on-one.
Based on the AWS Essentials Course, AWSome Day is ideal for IT managers, business leaders, system engineers, system administrators, developers and architects who are eager to learn more about cloud computing and how to get started on the AWS Cloud.
Why you should attend:
Gain a deeper understanding of AWS core and application services
Learn how to deploy and automate your infrastructure on the AWS Cloud
Prepare for the AWS Certified Cloud Practitioner exam
Get your questions answered by our AWS experts
Receive a Certificate of Attendance when you complete all the modules
Agenda
Module 1: AWS Cloud Concepts
This module will cover the value of cloud and the benefits of adopting AWS Cloud.
Module 2: AWS Core Services
This module will cover several of the AWS categories and services – what the services do, when and how to use them.
Module 3: AWS Security
This module will cover how AWS approaches securing the cloud, along with the AWS Shared Responsibility Model, AWS Access Control and Management, AWS Security Compliance Programs, and resources available to aid you in better understanding AWS Cloud security options.
Module 4: AWS Architecting
This module will cover AWS Architecting, which includes the Well-Architected Framework and reference architectures for Fault Tolerance & High Availability and Web Hosting.
Module 5: AWS Pricing and Support
This module will cover fundamentals of pricing and elements of pricing for several key services, as well as the TCO Calculator and AWS support plans.
Introduction to the C# Language and the .NET Framework
C# is an elegant and type-safe object-oriented language that enables developers to build a variety of secure and robust applications that run on the .NET Framework. You can use C# to create Windows client applications, XML Web services, distributed components, client-server applications, database applications, and much, much more. Visual C# provides an advanced code editor, convenient user interface designers, integrated debugger, and many other tools to make it easier to develop applications based on the C# language and the .NET Framework
C# Language
C# syntax is highly expressive, yet it is also simple and easy to learn. The curly-brace syntax of C# will be instantly recognizable to anyone familiar with C, C++ or Java. Developers who know any of these languages are typically able to begin to work productively in C# within a very short time. C# syntax simplifies many of the complexities of C++ and provides powerful features such as nullable value types, enumerations, delegates, lambda expressions and direct memory access, which are not found in Java. C# supports generic methods and types, which provide increased type safety and performance, and iterators, which enable implementers of collection classes to define custom iteration behaviors that are simple to use by client code. Language-Integrated Query (LINQ) expressions make the strongly-typed query a first-class language construct.
As an object-oriented language, C# supports the concepts of encapsulation, inheritance, and polymorphism. All variables and methods, including the Main method, the application’s entry point, are encapsulated within class definitions. A class may inherit directly from one parent class, but it may implement any number of interfaces. Methods that override virtual methods in a parent class require the override keyword as a way to avoid accidental redefinition. In C#, a struct is like a lightweight class; it is a stack-allocated type that can implement interfaces but does not support inheritance.
In addition to these basic object-oriented principles, C# makes it easy to develop software components through several innovative language constructs, including the following:
Encapsulated method signatures called delegates, which enable type-safe event notifications.
Properties, which serve as accessors for private member variables.
Attributes, which provide declarative metadata about types at run time.
Inline XML documentation comments.
Language-Integrated Query (LINQ) which provides built-in query capabilities across a variety of data sources.
If you have to interact with other Windows software such as COM objects or native Win32 DLLs, you can do this in C# through a process called “Interop”. Interop enables C# programs to do almost anything that a native C++ application can do. C# even supports pointers and the concept of “unsafe” code for those cases in which direct memory access is absolutely critical.
The C# build process is simple compared to C and C++ and more flexible than in Java. There are no separate header files, and no requirement that methods and types be declared in a particular order. A C# source file may define any number of classes, structs, interfaces, and events.
C# programs run on the .NET Framework, an integral component of Windows that includes a virtual execution system called the common language runtime (CLR) and a unified set of class libraries. The CLR is the commercial implementation by Microsoft of the common language infrastructure (CLI), an international standard that is the basis for creating execution and development environments in which languages and libraries work together seamlessly.
Source code written in C# is compiled into an intermediate language (IL) that conforms to the CLI specification. The IL code and resources, such as bitmaps and strings, are stored on disk in an executable file called an assembly, typically with an extension of .exe or .dll. An assembly contains a manifest that provides information about the assembly’s types, version, culture, and security requirements.
When the C# program is executed, the assembly is loaded into the CLR, which might take various actions based on the information in the manifest. Then, if the security requirements are met, the CLR performs just in time (JIT) compilation to convert the IL code to native machine instructions. The CLR also provides other services related to automatic garbage collection, exception handling, and resource management. Code that is executed by the CLR is sometimes referred to as “managed code,” in contrast to “unmanaged code” which is compiled into native machine language that targets a specific system. The following diagram illustrates the compile-time and run-time relationships of C# source code files, the .NET Framework class libraries, assemblies, and the CLR.
Language interoperability is a key feature of the .NET Framework. Because the IL code produced by the C# compiler conforms to the Common Type Specification (CTS), IL code generated from C# can interact with code that was generated from the .NET versions of Visual Basic, Visual C++, or any of more than 20 other CTS-compliant languages. A single assembly may contain multiple modules written in different .NET languages, and the types can reference each other just as if they were written in the same language.
In addition to the run time services, the .NET Framework also includes an extensive library of over 4000 classes organized into namespaces that provide a wide variety of useful functionality for everything from file input and output to string manipulation to XML parsing, to Windows Forms controls. The typical C# application uses the .NET Framework class library extensively to handle common “plumbing” chores.
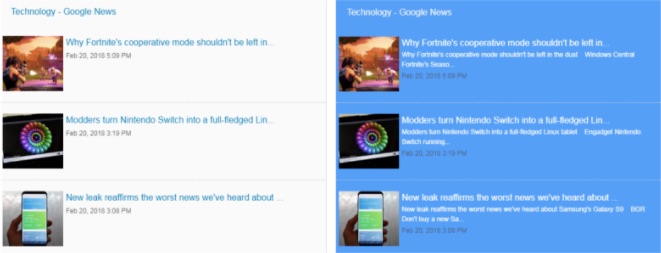
If you wish to add a Google News feed to your website and display it with the FeedWind widget, you just need to follow our instructions. There are two main steps.
Step 1: Set up a Google News RSS Feed
You need to manually create a RSS feed URL.
You can display them by “Top News”, topic, or search query.
If you wish to have news in English and located from the United States sources, add the following query string to the URL to change country and language:
&hl=en-US&gl=US&ceid=US:en
Step 2: Set up a FeedWind widget
To create a FeedWind widget, you will need to have a FeedWind account and to be signed in. If you don’t have an account, it will take you about 1 minute to sign up. It’s really easy!
Click the Create Widget button (you can find it at the top right corner of your screen) and then select RSS Feed
Now you will copy the Google News feed address you retrieved in Step 1 and paste it to the Feed URL box. Click anywhere outside the box and you will see the preview of the widget on the right side.
If you wish, you can customize your widget and play with the color, size, style, or scroll type so as to match the style and colors of your website.
Recurring deposit is scheme offered by banks where a person deposits monthly installment and banks gives higher interest rates than saving account. Recurring deposit is kind of fixed deposit and interest rates of recurring deposit is just little less than fixed deposit.
Recurring deposit is suitable for those people who have constant source of income, for example salaried people. It is best solution for medium term saving (6 months to 3 years) with higher interest rates.
Recurring Deposit Interest : The interest rates given by banks is generally above 8.0% and it is compounded quarterly (means when your money gains interest in a year).
Lets take an example and then we will calculate recurring deposit step by step with explanation.
Example: Suppose you want to purchase a motorcycle next year and you want to save some money for it but you also want higher interest rates, so you chose to start RD. You start an RD of Rs.5000 for 1 year. So you are going to deposit Rs.5000 in the bank for next one year. And your bank gives you interest 8.25% for 1 year compounding quarterly.
This means, for you first installment of Rs.5000, you’ll get 8.25% interest for 12 months from the bank compounding quarterly. For the second installment, you’ll get 8.25% interest for 11 months compounding quarterly, and for third installment of Rs.5000, you’ll get 8.25% interest for 10 months compounding quarterly and so on.
Recurring Deposit Formula
A = P*(1+R/N)^Nt
A = Maturity amount.
P = Principal amount (In our case, it is Rs.5000)
R = Interest rate in decimal, convert interest rate into decimal by dividing it by 100 (In our case, 8.25/100 = 0.0825)
T = Time duration in months (In our case, it will be 12 months)
t = Time duration in years
N= compounding frequency (since it is quarterly, it will be 4)
Calculating recurring deposit maturity amount:
Now, we will calculate amount (A) from above formula for each installment we pay, starting from first month to 12th month and then add all of them. So the final maturity amount will be
A = A1+A2+A3+…..+A12
A1, A2, A3,,,A12 are the maturity amount for respective installment.
Month
P
R
T(months)
t(years)
N
A= P*(1+R/N)^Nt
1
5000
0.0825
12
12/12
4
A1 = 5425.44
2
5000
0.0825
11
11/12
4
A2 = 5388.64
3
5000
0.0825
10
10/12
4
A3 = 5352.10
4
5000
0.0825
9
9/12
4
A4 = 5315.80
5
5000
0.0825
8
8/12
4
A5 = 5279.75
6
5000
0.0825
7
7/12
4
A6 = 5243.94
7
5000
0.0825
6
6/12
4
A7 = 5208.38
8
5000
0.0825
5
5/12
4
A8 = 5173.05
9
5000
0.0825
4
4/12
4
A9 = 5137.97
10
5000
0.0825
3
3/12
4
A10 = 5103.12
11
5000
0.0825
2
2/12
4
A11 = 5068.51
12
5000
0.0825
1
1/12
4
A12 = 5034.14
A = 62730.84
Using the above formula, we have calculated amount for each installment and then added all of them to get our final maturity amount.
For the first 5000 that you deposited in the bank, you will get interest for 12 months (t = 12/12 = 1), and for the second installment that you paid, you’ll get interest for 11 months.
Its not that hard to calculate RD maturity amount, you just need to understand the formula for calculating recurring deposit maturity amount.
TDR, STDR, RD and FLEXI DEPOSIT all are types of fixed deposits which can be done both manually and through internet banking. When these are done through internet, i.e., electronically, they are titled with prefix “e” and called e-TDR, e-STDR, e-RD, and e-SBI Flex Deposit.
TDR: Term Deposit Receipt is issued for a fixed period with fixed rate of interest payable monthly, quarterly, half yearly, yearly or on maturity. Interest is calculated at simple rate of interest.
STDR: Special Term Deposit Receipt is also issued periodically as above but interest payable with principal only on maturity. Interest is compounded on quarterly basis.
RD: Recurring Deposit is a monthly fixed deposit investment attracting small investors with same rate of interest period wise as payable to TDR or STDR. This also fetches quarterly compounded interest and invested for 6 months to 120 months and pass book is issued to easier the investor to track his deposits.
FLEXI DEPOSIT: It is similar to RD account but without any “ fixed” monthly installment. You can deposit any amount above minimum of Rs 500/— as per your capacity.
1. Can I open a recurring deposit (RD) account through Internet banking ?
Yes, if you have Internet banking user name and password, and at least one transaction account mapped to the username.
2. What is the minimum tenure for an online deposit ?
The period of deposit shall be minimum 12 months and maximum 120 months.
3. What are the interest rates for a recurring deposit ?
The interest rates vary from time to time. You can view the latest interest rates by clicking on “View current interest rate” link provided in e-RD request page.
4. What is the minimum amount for a recurring deposit a/c ?
The minimum amount of monthly installment shall be Rs 100. The amount of installment and number of installment can not be changed after opening of the account.
5. In whose name will the Recurring deposit (RD) account be opened? What is the mode of operation ?
The name(s) and mode of operation and branch of newly generated deposit a/c will be same as in debit a/c, from which RD a/c is funded.
6. How is the maturity amount calculated? Can I make enquiry before opening e-RD ?
The maturity amount is based on the installment, tenure & type of a/c selected by the customer. The maturity value of RD is rounded off to the nearest rupee and paid after 30 days /one month deposit of last installment or on the expiry of the period, for which the deposit was accepted, whichever is later. You may enquire the maturity amount, maturity date and rate of interest, without opening e-RD through “Enquiry” tab available in e-RD page.
7. What are the types of accounts from which I can debit an amount for the deposit ?
You can debit a current account to open RD account. The account selected for debiting should be valid transactional a/c through Internet Banking channel and should not be a stopped / dormant / locked account.
8. Can I open online term deposit a/c for any other name(s), not belonging to debit a/c from which recurring deposit a/c is funded ?
No, You may contact the branch for the same.
9. Can I transfer the maturity money to any of my accounts ?
No, maturity amount or the amount payable before maturity will be transferred only to the debit account from which the first was funded.
10. Is there any cut off time for creating e-RD online ?
Yes. e-RD can be created online from 8:00 AM IST to 8:00 PM IST. Requests initiated beyond this period will be scheduled for the next opening hours.
11. How can I cancel my standing instruction for e-RD ?
You may cancel your standing instructions, which are set through Internet Banking, by “View/Cancel” tab, under e-Services -> Standing instruction link.
12. Is it mandatory to set standing instructions for periodic installment payment of RD ?
No, you can pay the installment at your branch or you can also set the standing instruction at branch or through Internet banking anytime. Only your first installment is paid online at the time of opening of RD a/c.
13. Can I close my RD account online ?
Yes, you may close your RD a/c online through “Close A/c” tab under e-RD, which are created through e-RD only. RD a/c created through any other means can not closed through “Close a/c” tab under e-RD.
14. What are the charges for RD pre-mature closure ?
Interest paid on premature withdrawal of term deposits could be less than the contracted rate, as per the applicable rule on the date of premature payment.
15. What is the penalty for default in installment payment ?
Whenever a depositor fails to pay the installment on due date for three consecutive months the account shall not be closed and service charge of Rs 10/- is applicable. The penalty charged on delayed payment of instalment shall be i) Penalty in case of delay in payment of installment of RD of 5 years or less shall be Rs 1.50 for every Rs 100 per month. ii) Such penalty shall be Rs 2.00 for every Rs. 100 per month for the account on more than 5 years.
16. What are the maturity instrcuctions applicable to e-RD ?
You can choose “Payback Principal and Interest” or “Convert to STDR” as maturity instruction for your e-RD. “Payback Principal and Interest” option will transfer the maturity proceeds to your debit account on maturity of e-RD. “Convert to STDR” option will create fixed deposit for period selected by you with the maturity amount of e-RD.
Get access to the latest updates and developments across Microsoft’s products and solutions. Understand Microsoft’s strategy and product roadmaps. Learn about new technology and open source software in innovative ways.
Connect
Connect with subject matter experts who build and support the products and services you use every day. Network with your community and peers to share best practices and discuss new technology.
Hands-on
Explore the latest tools and technologies. Get inspired to think outside the box through a variety of hands-on demos, interactive experiences, and real-time problem solving.
Asset trackers are an often required component for any company that has trucks, buses, or other assets that are on the move. In this codelab you will build the front end components that are responsible for driving a Transport Tracker solution, based on the I/O Bus Tracker. We will show you how to use the Google Maps JavaScript API, along with Firebase Realtime Database, to build a system that can be used to track assets in near real time.
What you’ll build
In this codelab, you’ll build a web application that:
Is dynamic – you’ll use Firebase Realtime Database to source the dynamic data from the backend and to move markers on the map in response to realtime transactions.
Uses a customised map, styled to suit a particular purpose and brand.
Displays a realtime time table for buses or other types of transport.
Move markers around a map dynamically, based on transaction notifications from Firebase Realtime Database.
What you’ll need
Before starting this codelab, please complete the Transport Tracker Backend codelab. You’ll need the Google Cloud Platform project and the Firebase Realtime Database that you created during that codelab.
You also need a basic knowledge of Node.js, NPM, JavaScript and CSS.
This codelab focuses on the Google Maps JavaScript API. Non-relevant concepts and code blocks are glossed over and are provided for you to simply copy and paste.
2. Getting set up
Environment setup
This codelab is a follow-on from the Transport Tracker Backend codelab. You’ll need the Google Cloud Platform project and the Firebase Realtime Database that you created during that codelab. If you haven’t done the codelab, please take the time to do it now.
Sign in to Google Cloud Platform console (console.cloud.google.com) and open the project that you created during the Transport Tracker Backend codelab.
Activate Cloud Shell: on the Cloud platform console, click the button on the top right-hand side:
Next, you need to enable the Google Maps JavaScript API for your Google APIs project. Go to the Google API Console, open the project that you created in step 4 of the Transport Tracker Backend codelab, and check the list of enabled APIs on the console Dashboard. If the Google Maps JavaScript API is not there, click Enable API, and search for the Maps JavaScript API.
Enable the API:
3. Firebase Hosting for a Google Map
Starting development with a map
The inevitable starting point for any web application based on geographical information, like say tracking the locations of buses, is a map. The first thing we are going to do is put a map on a web page, showing the location of Google I/O. For this codelab we’ll use Firebase Hosting to house the static contents of this web app, and we’ll source the dynamic data for this app from the Transport Tracker Backend codelab.
In the toolbar of the Cloud Shell, click on the file icon to open a menu, and then select Launch code editor to open the code editor in a new tab.
Create a new transport-tracker-map directory for your application in the code editor, by opening the File menu, and selecting New > Folder.
Name the new folder transport-tracker-map:
Next you’ll create a small Firebase Hosting web app to make sure everything’s working. In the editor, create a new file under the transport-tracker-map directory called package.json, and put the following content in it:
package.json
{ "name":"transport-tracker-map", "version":"1.0.0", "description":"A map showing the real time location of buses.", "scripts":{ "prettier":"prettier --write --single-quote --bracket-spacing=false public/js/*.js", "firebase-init":"firebase init", "firebase-login":"firebase login --no-localhost", "firebase-deploy":"firebase deploy" }, "author":"Brett Morgan", "license":"Apache-2.0", "devDependencies":{ "firebase-tools":"^3.6.1", "prettier":"^1.2.2" } }
This file declares the project’s dependency on firebase-tools, the npm version of Firebase CLI, along with prettier, an opinionated JavaScript formatter. The scripts section of this file also includes the Firebase commands we’ll need to run, to create a project, get an authentication token, and then deploy our web app to Firebase Hosting. Let’s get started with firebase init.
On the Google Cloud Shell command line, change the current working directory to the transport-tracker-mapdirectory created above:
cd ~/transport-tracker-map/
Next, run npm install to pull down all of the dependencies declared in the package.json file:
npm install
We will be using Firebase in this tutorial, so we need to log in. You can do that by running the following command:
npm run firebase-login
This will ask you whether you want to allow Firebase to collect anonymous CLI usage information (please say yes, it allows us to build tools that more appropriately reflect actual usage), and then it will give you a URL to cut’n’paste into your web browser.
Highlight the URL in Google Cloud Shell, then copy it into your copy buffer and paste it into a new tab in your Chrome browser. This will take you to a Google login page that will ask you to choose which account to authorize Firebase CLI to operate as. After you have enabled Firebase CLI to authenticate as the selected user, you will be given a token that you can cut’n’paste back into the Google Cloud Shell session, to authenticate the Firebase CLI. You should see a line stating the the tool is successfully logged in as your user. If not, repeat the above process until successful.
Now, we can create a default Firebase Hosting web app.
npm run firebase-init
The first question you will be asked is which features of Firebase you will be using in this project.
Use the arrow keys to move up and down the list. Use the spacebar to deselect the Functions option, but leave Databaseand Hosting selected. Press Enter when you’re ready.
Next you will be asked to select a default Firebase project for this directory. Scroll through the list of available Firebase projects until you find the one you are populating with the Transport Tracker Backend Node.js app. It is important that you select the same Firebase project for both the backend and the map, so that they communicate through the same Firebase Realtime database. Press Enter after selecting the right project.
Next you will be asked for the name of the database rules JSON file. Go with the default of database.rules.json.
Next you will be asked which directory you want to use to contain the files that Firebase Hosting will serve. Go with the default of public.
Then you are asked whether to rewrite all URLs to /index.html. Go with the default answer of No.
After this the Firebase CLI tool will create a public directory with an index.html and a 404.html, along with a database.rules.json file. You should be able to inspect these files in the editor, but you may have to restart it first before the public directory will be visible. You can publish these files as is to Firebase Hosting to prove that everything is working:
npm run firebase-deploy
The last line of output from the firebase command will be a URL for your newly created web application. Please feel free to open the URL in a new Chrome tab and marvel at the beautiful pixels.
Before going any further, we will update the database rules to allow read access to anyone, while retaining credentials to write to the database. Open the database.rules.json file in the editor, and change the contents to match the following.
<metacharset="utf-8"> Transport Tracker <linkhref="https://fonts.googleapis.com/css?family=Roboto:300,400,500"rel="stylesheet"> <linkrel="stylesheet"type="text/css"href="css/main.css">
In the script element at the end of the HTML file, replace the value API_KEY with your Maps API key, which you obtained in the Transport Tracker Backend codelab. (You can find the Maps API key in your ~/transport-tracker-server/tracker-configuration.json file.)
The above index.html file has two declared dependencies that we need to fulfill, one for a CSS style sheet, and the other for a JavaScript file that will set up the map. The JavaScript file will contain an initMap function that the Google Maps JavaScript API will call once it has loaded.
Create a css directory under ~/transport-tracker-map/public. In the css directory, create a new file called main.css and put the following CSS code in it:
The above code contains two top level elements. The first is a map style in JSON format. The second is a function declaration for initMap, which will be called by Google Maps JavaScript API. You can fashion your own map style with the Google Maps APIs Styling Wizard.
Now that all of the content is in place, re-run the Firebase Hosting deploy step:
npm run firebase-deploy
This will update the content in Firebase Hosting. Reopen the hosting URL and you should see a styled map, centered on South Bay.
In the next step we will connect this map with the Firebase Realtime Database, and start displaying the real time location of buses. Exciting!
4. Moving markers around a map
Moving a map with Firebase
In this step we will connect the map web app created in the previous step with the Firebase Realtime Database that the Transport Tracker Backend is publishing into. Using Firebase Hosting makes this easier, because we can include the Firebase project credentials into the hosted app automatically. To see how, let’s make some changes to the three files we created in the last step.
First, open up the index.html file again, and change its content to the following:
<metacharset="utf-8"> Transport Tracker <linkhref="https://fonts.googleapis.com/css?family=Roboto:300,400,500"rel="stylesheet"> <linkrel="stylesheet"type="text/css"href="css/main.css">
<divclass="top-bar"> <spanclass="io-bus-tracker">Transport Tracker <spanid="display-time"class="display-time">9:00 AM, May 18th <spanclass="google-maps-apis">
Remember to replace the value API_KEY with your own Maps API key.
We have made a couple of additions. Firstly, we have added a div above the map, with a class of io-bus-tracker,that will show the time and date. Currently it has boilerplate text, but we’ll populate it from Firebase soon enough. Next we have added a div under the map div, containing some inline SVG. This SVG represents the pager notification at the bottom of the map, indicating which page of results is being shown. We will modify this SVG in response to changes in the Firebase Realtime Database. Finally, we’ve included in the Firebase JavaScript libraries to allow us to use the Firebase Realtime Database.
As described above, we have added two div elements to our HTML, so we need to appropriately style them. Open up the css/main.css file again, and change its contents to match the following:
There is a fair amount of new code here, but if we work through it slowly, it should start to make sense. The first thing to realize is that we have three separate sets of markers on this map. The first, denoting the location of Google I/O, is a fixed marker that is created at map creation time, and then never changed again. We place this marker using the Google Maps JavaScript API Geocoding Service in the geocodeAddress function. The next set of markers represent the hotels that the I/O buses pick up from and drop off to. We manage these using a class called HotelMarkerManager. The markers displayed change for each displayed panel. The final set of markers represent the real time location of our roving buses, and they are managed by the BusMarkerManager.
In the significantly beefed up initMap function declared at the bottom of the index.js file, we first geocode the location of Google I/O, then we use document.querySelector to get references to parts of the HTML page’s DOM, and then we wire up callbacks for changes on various parts of the Firebase Realtime Database. The first callback for the current-time path is used to populate the time and date in the top bar, the map path is used to control the location of the map and display appropriate hotels, and the bus-locations path is used to plot out the real time locations of the buses.
Before we publish this new version of our app, there is something very important missing. We need images for each of these markers. You can download these images as a zip file from GitHub. In your Google Cloud Shell, change directory into the ~/transport-tracker-map/public directory, and run the following command.
Next we need to unzip the file you just downloaded into the public directory alongside the js and css directories. In the same ~/transport-tracker-map/public directory as above, run the following command.
unzip images.zip
You should now have a newly minted images directory alongside your js and css directories.
Now you can re-deploy your application and look at the resulting map.
npm run firebase-deploy
You should see a map of the San Francisco Bay area, with a few markers showing the locations of buses, hotels, and Google I/O, something like this:
In the next step, we will render cards that show the upcoming departures. In other words, time to get time tabling!
5. Displaying a dynamic time table
Showing all the cards
Now that we have a map with markers for buses, hotels and Google I/O itself, it’s time to overlay the map with the time table cards. This step is the one with the most code, because we are dynamically generating HTML for each of the cards, and inserting them into the DOM. While at first glance the approach we’ve taken of wholesale replacing the entire card set at each update may appear to be a sub-optimal approach, it turns out web browsers are highly optimised for parsing HTML.
Following the tradition of the last couple of steps, we will start by again making one key addition to the index.htmlfile. This additional div will be where we inject the HTML for the time table cards.
<metacharset="utf-8"> Transport Tracker <linkhref="https://fonts.googleapis.com/css?family=Roboto:300,400,500"rel="stylesheet"> <linkrel="stylesheet"type="text/css"href="css/main.css">
<divclass="top-bar"> <spanclass="io-bus-tracker">Transport Tracker <spanid="display-time"class="display-time">9:00 AM, May 18th <spanclass="google-maps-apis">
Remember to replace the value API_KEY with your own Maps API key.
Next, we add all the required CSS declarations to style our timetable cards. There is a lot of code here, taking advantage of CSS Flexbox. This important standard is widely available, and makes a massive difference to how easily a variety of layouts can be achieved in HTML. Well worth the time to learn this technology.
Lastly, we need to update our index.js file with the capability to render the time table information. Again, there is a lot of code here, but there are a couple of gems in there. One that I’d like to call out is that the bus icons on the cards are inline SVG that is recolored to the route color using simple ES6 string templates. No more messing about in an image editor just to change the color of an icon!
The Transport Tracker consists of the following components:
Data store
A Firebase Realtime Database that stores the vehicle locations, snapped to the road with theRoads API. Firebase provides realtime data synchronization to the backend and map.
Vehicle locator
An Android app that uses the fused location provider, in the Google Play services location APIs, to report its location to the Firebase Realtime Database.
Backend
The backend built in Node.js, that processes locations from the Firebase Realtime Database and predicts travel times using the Directions API.
Map
A web application that uses the Maps JavaScript API to display a styled map showing the bus locations and routes.
Administrator’s overview
A web interface for administrators, giving an overview of the assets being tracked. It displays a map using the Maps Static API, with vehicle and location data from the Firebase Realtime Database.
The Transport Tracker uses a Firebase Realtime Database to communicate location updates between the various components of the server and front end applications. When the vehicle locator, or the simulator, stores the location updates in the Firebase Realtime Database, Firebase sends automatic updates to the backend, which in turn updates the front end display.
Set up your Firebase Realtime Database project:
Go to the Firebase console and click Add project to create a project for your Transport Tracker.
Enter a project name.
Click Create Project.
Step 3. Get a Google Maps API key
Click the button below, which guides you through the process of registering a project in the Google Cloud Platform Console, activates the required Google Maps Platform and related services automatically, and generates a generic, unrestricted API key.
During development and testing, you can use a single, unrestricted Google API key for all the Google Maps Platform in your Transport Tracker. When you are ready to move your system into production, you must create separate API keys for each type of API, so that you can secure the keys by HTTP referrer or IP address. For help, see the pre-launch checklist.
Step 4. Set up the backend
The Transport Tracker backend is an npm Node.js application. It receives realtime updates of the vehicle locations from the Firebase Realtime Database, and sets up the panel configurations for use by the frontend displays. It also includes a vehicle location simulator, so you can run the Transport Tracker without having to move Android devices around to represent your vehicles.
Go to Google Cloud Platform console, sign in using your Google Account (Gmail or Google Apps) and create a new project.
Enter a name for your project, and take note of your allocated project ID.
Activate Google Cloud Shell from the Cloud platform console, by clicking the button at top right of the Cloud Shell toolbar.
The Cloud Shell window opens at the bottom of the Cloud console. This is where you can enter commands to interact with the shell. Refer to the Cloud Shell documentation for details.
In Google Cloud Shell, or locally if you’re not using Google Cloud, create a transport-trackerdirectory for your application, and copy across the backend directory from the cloned GitHub repo:
mkdir transport-tracker cd transport-tracker cp <my-cloned-repo>/backend/. cd backend
Edit the file serviceAccountKey.json, and paste in your Firebase adminsdk service account credentials from the file you downloaded earlier. Hint: If you’re using the Google Cloud Shell, you can use Cloud’s code editor.
Edit the tracker_configuration.jsonfile and add the following values:
databaseURL – the address of your Firebase Realtime Database. You can find the URL in the Admin SDK configuration snippet on the Firebase Service Accounts tab.
simulation – a configuration setting that determines whether to use the vehicle simulator or real location data from the vehicle locator. While developing and testing, set this value to true.
Run npm install to install your dependencies. This may take a few minutes.
Run the application:
npm run main
Open your Firebase Realtime Database to see the results:
The Transport Tracker’s primary display is a web application showing a styled map from the Maps JavaScript API with markers indicating the locations of the tracked vehicles, retrieved from the Firebase Realtime Database. Panels on the map show the routes and departure times.
Follow these steps to set up the map:
Create a transport-tracker-map directory for your application on your server, and copy across all the files from the map directory in the cloned repo:
cd transport-tracker-map cp <my-cloned-repo>/map/.
Edit the index.html file, find the element at the bottom of the file, and replaceYOUR_API_KEY with your Google Maps API key. If you don’t have an API key yet, follow theguide to getting an API key.
Go to the Firebase console and open your project, then click Add Firebase to your web app. Copy the config object that appears on the Firebase console. The config object contains the Firebase authentication values that you need in the next step.
Edit the js/index.js file and populate the firebaseConfig object with the Firebase authentication fields and values from the config object that you copied in the previous step. See the Firebase documentation for more information.
Run npm install to install your dependencies.
Run the application:
npm run main
Step 6. Set up the vehicle locator Android app
The vehicle locator is an Android app that sends location updates to the Firebase Realtime Database.
Follow these steps to build and run the Android app:
Create a new Android development project:
In Android Studio, choose File > New > Import project.
Go to your cloned repo and open the android directory in Android Studio.
Connect your app to Firebase using the Firebase Assistant:
In Android Studio, click Tools > Firebase to open the Assistant window.
Click to expand one of the listed features (for example, Analytics), then click the provided tutorial link (for example, Log an Analytics event).
Click Connect to Firebase.
Go back to Android Studio and enter your project details in the Connect to Firebase dialog that opens there.
Select Choose an existing Firebase or Google project, then select your Transport Tracker project.
Click Connect to Firebase, and watch the messages in the Android Studio status bar.
When the process is complete, a message appears in the Android Studio event log: “Firebase project created and connected locally to module: app.” Notice the new google-services.json file in your project’s app directory.
Build and run your app. You should see the Transport Tracker startup screen on your Android device, as shown in the screenshot on this page.
Add one or more users to Firebase, so that you can authenticate them to your app:
Go to the Firebase console and open the project you created above.
Enable email and password as an authentication method:
Click Authentication, then Set up sign-in method.
Click Email/Password, then Enable and Save.
Click Add user and specify a valid email address and a password. Take note of the password, because the user needs it to authenticate to your vehicle locator app.
To start tracking on the Android device, enter the following information on the vehicle locator screen:
Transport ID: A recognizable short identification code for the vehicle you’re tracking. This ID appears on the administrator’s overview map to indicate the location of the vehicle. For example, use the license plate number of each vehicle as the transport ID.
Email: The email address corresponding to a user created in the Firebase user management console.
Password: The password recorded in Firebase for the above user.
Tap Start Tracking. You should see an update in the notification area on your Android device indicating that the Transport Tracker is tracking the device.
Step 7. Set up the administrator’s overview
The administrator’s overview is a web interface for administrators, showing a summary of the assets being tracked. It displays a map using the Maps Static API, with vehicle and location data from the Firebase Realtime Database.
Follow these steps to set up the administrator’s overview:
Create a transport-tracker-admin directory for your application on your server, and copy across all the files from the admin directory in the cloned repo:
cd transport-tracker-admin cp <my-cloned-repo>/admin/.
Cloud computing is the delivery of computing services servers, storage, databases, networking, software, analytics, intelligence and more over the Internet (“the cloud”) to offer faster innovation, flexible resources, and economies of scale. You typically pay only for cloud services you use, helping lower your operating costs, run your infrastructure more efficiently, and scale as your business needs change.
What are the Benefits ?
Cost
Cloud computing eliminates the capital expense of buying hardware and software and setting up and running on-site data centers the racks of servers, the round-the-clock electricity for power and cooling, the IT experts for managing the infrastructure. It adds up fast.
Speed
Most cloud computing services are provided self service and on demand, so even vast amounts of computing resources can be provisioned in minutes, typically with just a few mouse clicks, giving businesses a lot of flexibility and taking the pressure off capacity planning.
Global Scale
The benefits of cloud computing services include the ability to scale elastically. In cloud speak, that means delivering the right amount of IT resources for example, more or less computing power, storage, bandwidth right when it’s needed, and from the right geographic location.
Productivity
On-site data centers typically require a lot of “racking and stacking”—hardware set up, software patching, and other time-consuming IT management chores. Cloud computing removes the need for many of these tasks, so IT teams can spend time on achieving more important business goals.
Performance
The biggest cloud computing services run on a worldwide network of secure data centers, which are regularly upgraded to the latest generation of fast and efficient computing hardware. This offers several benefits over a single corporate data center, including reduced network latency for applications and greater economies of scale.
Security
Many cloud providers offer a broad set of policies, technologies, and controls that strengthen your security posture overall, helping protect your data, apps, and infrastructure from potential threats.
What are the types of Cloud Computing?
Public Cloud
Public clouds are owned and operated by a third-party cloud service providers, which deliver their computing resources like servers and storage over the Internet. Microsoft Azure is an example of a public cloud. With a public cloud,all hardware, software, and other supporting infrastructure is owned and managed by the cloud provider. You access these services and manage your account using a web browser.
Private Cloud
A private cloud refers to cloud computing resources used exclusively by a single business or organization. A private cloud can be physically located on the company’s on-site data center. Some companies also pay third-party service providers to host their private cloud. A private cloud is one in which the services and infrastructure are maintained on a private network.
Hybrid Cloud
Hybrid clouds combine public and private clouds, bound together by technology that allows data and applications to be shared between them. By allowing data and applications to move between private and public clouds, a hybrid cloud gives your business greater flexibility, more deployment options, and helps optimize your existing infrastructure, security, and compliance.
What are the types of Cloud Services?
Most cloud computing services fall into four broad categories: infrastructure as a service (IaaS), platform as a service (PaaS), serverless, and software as a service (SaaS). These are sometimes called the cloud computing stack because they build on top of one another. Knowing what they are and how they’re different makes it easier to accomplish
your business goals.
Infrastructure as a service (IaaS)
The most basic category of cloud computing services. With IaaS, you rent IT infrastructure servers and virtual machines (VMs), storage, networks, operating systems from a cloud provider on a pay-as-you-go basis.
Platform as a service (PaaS)
Platform as a service refers to cloud computing services that supply an on-demand environment for developing, testing, delivering, and managing software applications. PaaS is designed to make it easier for developers to quickly create web or mobile apps, without worrying about setting up or managing the underlying infrastructure of servers, storage, network, and databases needed for development.
Server-less computing
Overlapping with PaaS, server-less computing focuses on building app functionality without spending time continually managing the servers and infrastructure required to do so. The cloud provider handles the setup, capacity planning, and server management for you. Server-less architectures are highly scalable and event-driven, only using resources when a specific function or trigger occurs.
Software as a service (SaaS)
Software as a service is a method for delivering software applications over the Internet, on demand and typically on a subscription basis. With SaaS, cloud providers host and manage the software application and underlying infrastructure, and handle any maintenance, like software upgrades and security patching. Users connect to the application over the Internet, usually with a web browser on their phone, tablet, or PC.
How Cloud Computing Works?
While cloud computing services all work a little differently, many provide a friendly, browser-based dashboard that makes it easier for IT professionals and developers to order resources and manage their accounts. Some cloud computing services are also designed to work with REST APIs and a command-line interface, giving developers multiple options.
Uses of cloud computing
You’re probably using cloud computing right now, even if you don’t realize it. If you use an online service to send email, edit documents, watch movies or TV, listen to music, play games, or store pictures and other files, it’s likely that cloud computing is making it all possible behind the scenes. The first cloud computing services are barely a decade old, but already a variety of organizations—from tiny startups to global corporations, government agencies to non-profits—are embracing the technology for all sorts of reasons.
Here are a few examples of what’s possible today with cloud services from a cloud provider:
Create new apps and services
Quickly build, deploy, and scale applications—web, mobile, and API—on any platform. Access the resources you need to help meet performance, security, and compliance requirements.
Store, back up, and recover data
Protect your data more cost-efficiently—and at massive scale—by transferring your data over the Internet to an offsite cloud storage system that’s accessible from any location and any device.
Stream audio and video
Connect with your audience anywhere, anytime, on any device with high-definition video and audio with global distribution.
Deliver software on demand
Also known as software as a service (SaaS), on-demand software lets you offer the latest software versions and updates around to customers—anytime they need, anywhere they are.
Test and build applications
Reduce application development cost and time by using cloud infrastructures that can easily be scaled up or down.
Analyze Data
Unify your data across teams, divisions, and locations in the cloud. Then use cloud services, such as machine learning and artificial intelligence, to uncover insights for more informed decisions.
Embed intelligence
Use intelligent models to help engage customers and provide valuable insights from the data captured.
MEA Attestation Service for Marriage Certificate in India
Attestation of a Marriage Certificate is asked if one wishes to use his personal documents in a foreign country.
Notary Attestation – Notary attestation is the basic and first step in the process of Marriage Certificate MEA Attestation and is carried out before further legalisation processes, where personal documents are submitted for notarization.Notarizing of a Marriage Certificate carries a Notary Stamp of a Lawyer.
Home Department Attestation – Verification from home department from the state you belong. It is the second step for Marriage Certificate MEA Attestation, after notary attestation the Marriage Certificate is submitted to state home department for further verification. The department verify the Marriage Certificate document.
SDM Attestation – SDM is a sub-divisional magistrate and authorized to verify personal documents on behalf of the home department. Well, this Marriage Certificate attestation process is an alternative for SHD attestation. In case getting an attestation from state is not feasible then Marriage Certificate can be attested directly from SDM for embassy attestation
MEA Attestation – Ministry of Foreign Affairs is a government commission responsible for India’s foreign relations. It is third step for Marriage Certificate MEA Attestation. The MEA attestation of personal documents is performed after verification from the state home department.The Marriage Certificate is further submitted to MEA to verify the Marriage Certificate MEA Attestation issued from any state in India is genuine.
Reference Agency in Chennai :
PEC Attestation, Apostille & Translation Services, Chennai, Tamil Nadu
Block No 31, Samson Towers, 8th Floor at Pantheon Road, and, 600 008, CASA Major Rd, Sulaiman Zackria Avenue, Egmore, Chennai, Tamil Nadu 600008, India